Vue

Vue单文件组件
基本用法
- 以**.vue**结尾
- template:组件的模块区域
- script:业务逻辑区域
- style:样式区域
1 | |
在webpack中使用vue
- 运行npm i vue -S安装
- 在src/index.js中通过**import Vue from ‘vue’**导入
- 创建vue的实例对象,并指定要控制的el区域
- 通过render函数渲染APP组件
1 | |
Vue脚手架
基本使用
- Vue脚手架是用于快速生成Vue项目的基础架构,官网
- 安装npm install -g @vue/cli
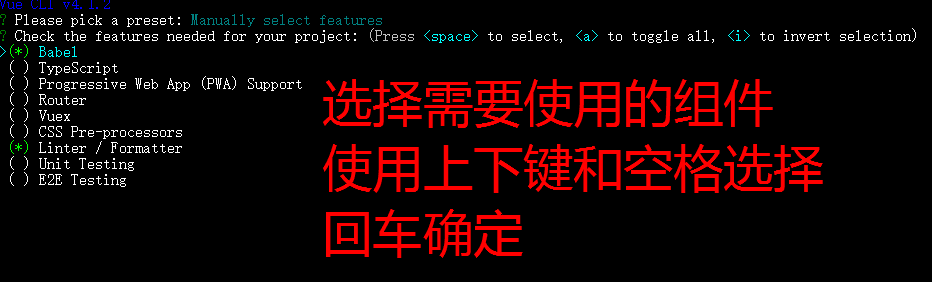
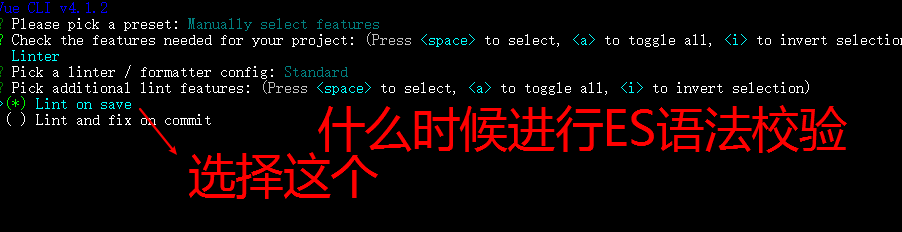
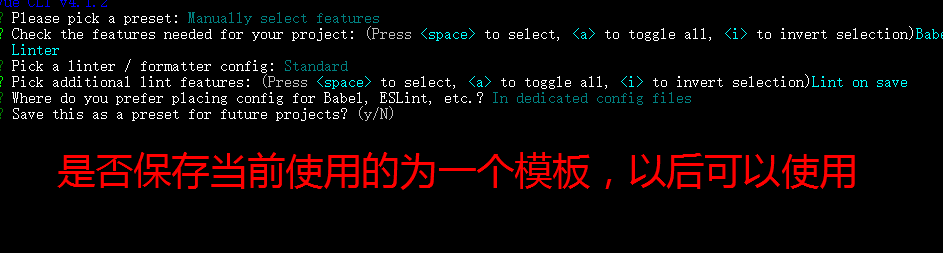
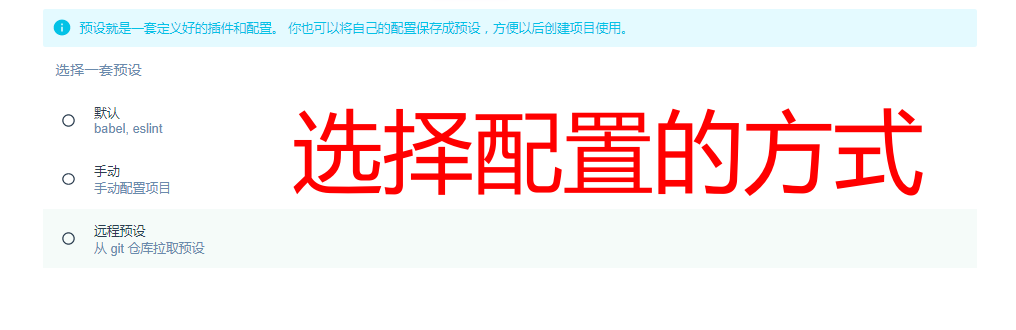
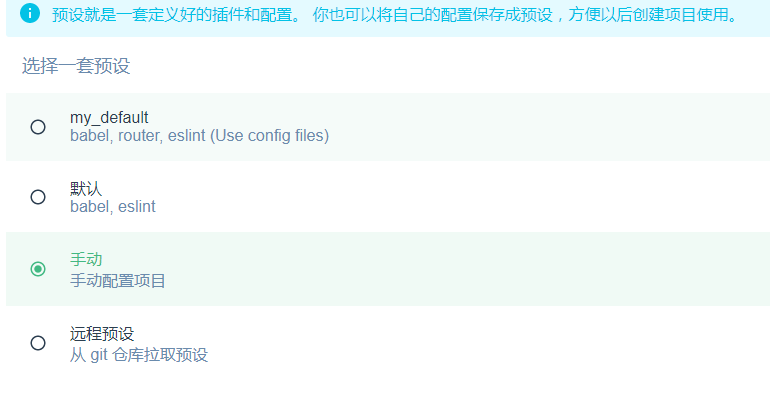
交互式命令行创建项目
- vue create 名字


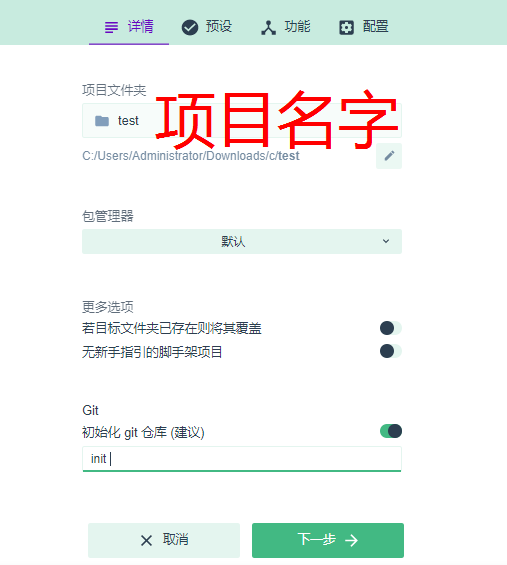
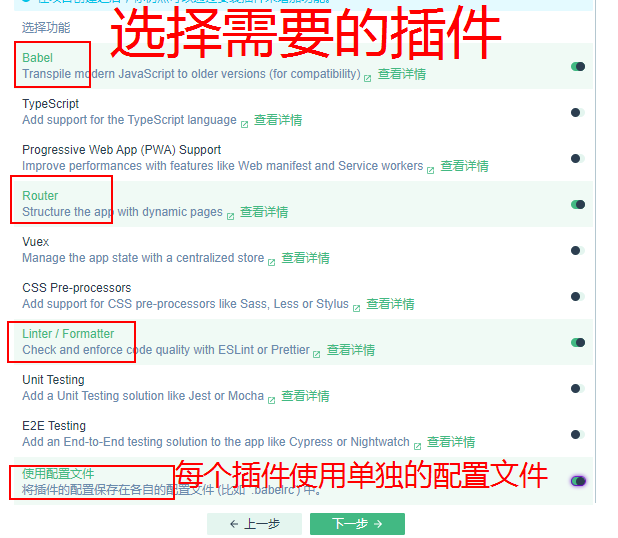
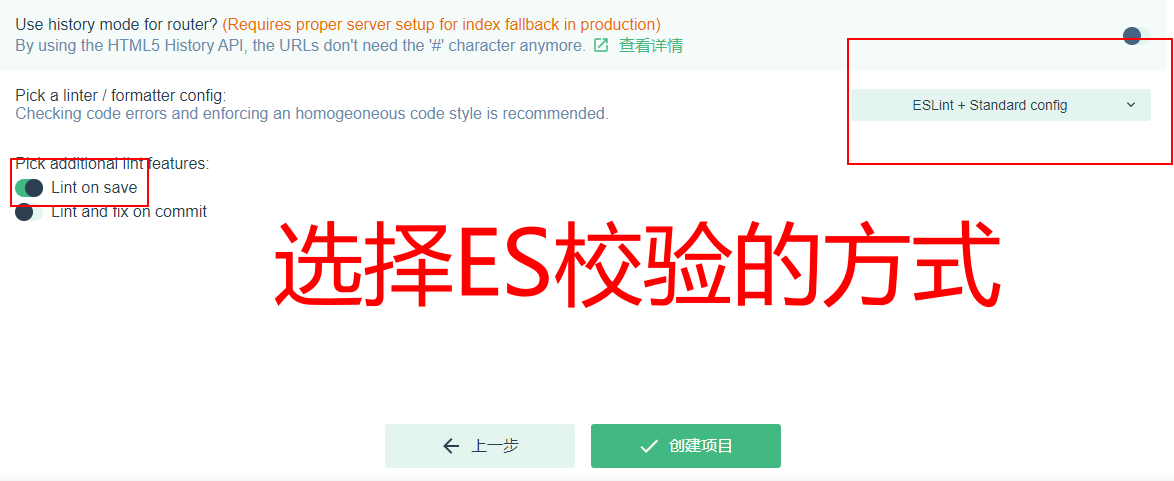
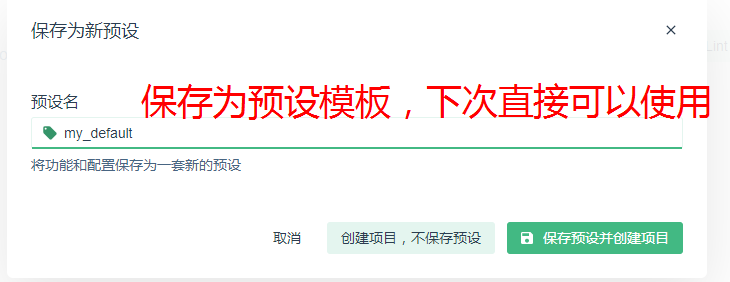
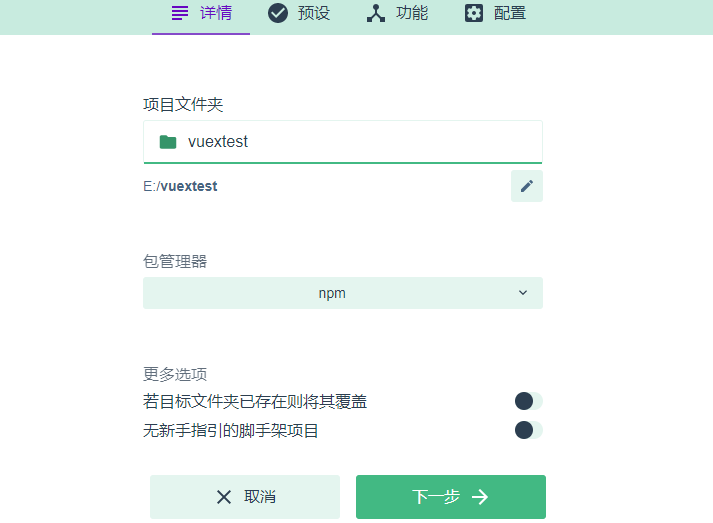
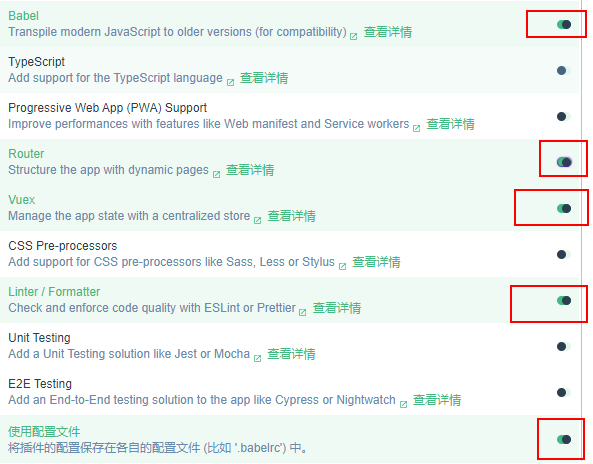
图形化界面创建项目
- vue ui


文件分析
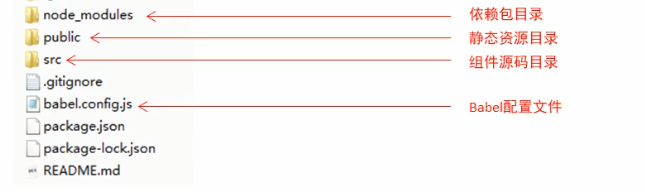
自定义配置package.json
1
2
3
4
5
6"vue":{
"devServer":{
"port":"8888", // 端口号为8888
"open":true // 打包成功后自动打开浏览器
}
}- 不推荐使用这种配置,应该单独定义到vue.config.js配置文件中
单独配置文件配置
- 在项目根目录创建vue.config.js
- 在该文件中进行配置,覆盖默认配置
1
2
3
4
5
6
7
8module.exports = {
devServer: {
// 自定义端口号
port: 8888,
// 自动打开浏览器
open: true
}
}
Element-UI
基于命令方式安装
安装依赖npm i element-ui -S
在main.js导入Element-UI资源
1
2
3
4
5
6// 导入组件库
import ElementUI from 'element-ui';
// 导入组件相关样式
import 'element-ui/lib/theme-chalk/index.css';
// 配置Vue插件
Vue.use(ElementUI);
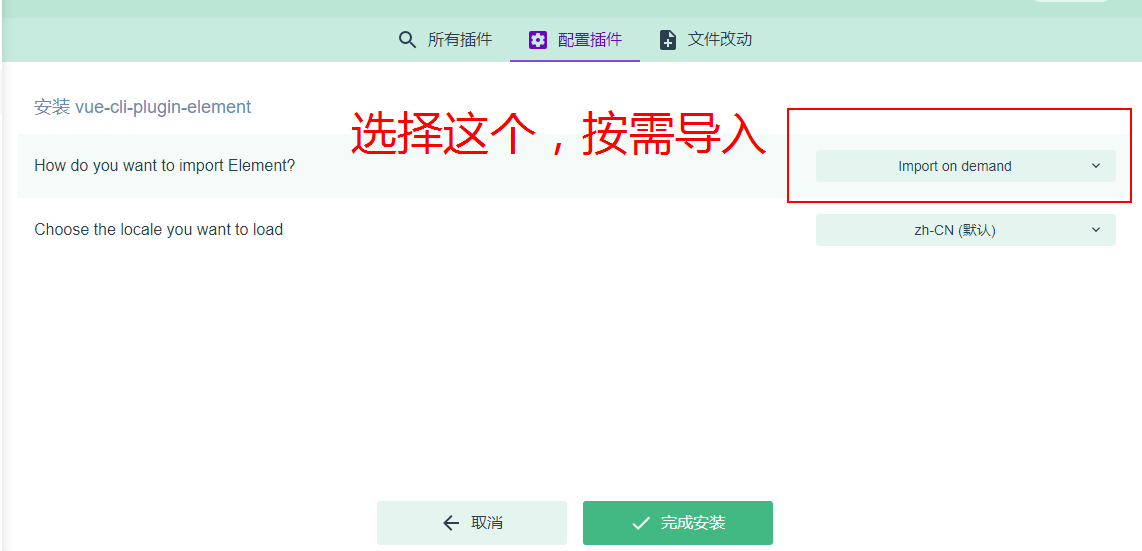
基于图形化界面
- 运行vue ui
- 通过Vue项目管理器进行具体的项目配置
- 点击插件-》添加插件,进行插件查询面板
- 搜索vue-cli-plugin-element安装
- 配置插件,实现按需导入
安装axios依赖

Vuex
基本介绍
- Vuex是实现组件全局状态(数据)管理的一种机制,可以方便的实现组件之间数据的共享
- Vuex中的数据都是响应式的,能够实时保持数据与页面的同步
使用
安装vuex依赖包npm install vuex –save
导入vuex包
1
2import Vuex from 'vuex'
Vue.use(Vuex)创建store对象
1
2
3
4const store = new Vuex.Store({
// state 中存放的就是全局共享的数据
state:{ count:0 }
})将store对象挂载到vue实例
1
2
3
4
5
6new Vue({
el: '#app',
// 将创建的共享数据对象,挂载到Vue实例中
// 所有的组件,就可以直接从store中获取全局的数据了
store
})

State
State提供唯一的公共数据源,所有共享的数据都要同意放到Store的State中进行存储
1
2
3
4// 创建store数据源,提供唯一公共数据
const store = new Vuex.Store({
state:{ 数据名称: 默认值 }
})
组件访问State中数据的第一种方式
1
this.$store.state.全局数据名称组件访问State中数据第二种方式
1
2
3
4
5
6// 1.从vuex中按需导入mapState函数
import { mapState } from 'vuex'
// 2.将全局数据,映射为当前组件的计算属性
computed:{
...mapState(['全局数据名称'])
}
Mutation
使用Mutation修改变更Store中的数据
1
2
3
4
5
6
7
8
9
10
11
12
13
14
15
16// 定义
const store = new Vuex.Store({
state:{
count:0
},
mutations:{
add(state){
// 变更状态
state.count++
},
// 传递参数
add2(state, step){
state.count += step
}
}
})第一种方式
1
2
3
4
5
6
7
8
9
10
11// 使用
methods:{
add(){
// 触发motations的第一种方式,下面这个add是mutations中的方法名字
this.$store.commit('add')
},
add2(){
// 传递参数
this.$store.commit('add2',3)
}
}第二种方式
1
2
3
4
5
6
7
8
9
10
11
12
13
14// 1. 从vuex中按需导入 mapMutations 函数
import { mapMutations } from 'vuex'
// 2. 将指定的 mutations 函数,映射为当前组件的 methods 函数
methods:{
...mapMutations(['add','add2']),
addf(){
this.add()
},
add2f(){
// 传递参数
this.add2(3)
}
}
Action
- Action用于异步处理
1 | |
- 触发actions的第一种方法
1 | |
触发actions的第二种方法
1
2
3
4
5
6
7
8
9
10
11
12
13
14// 1. 从vuex中按需导入 mapActions 函数
import { mapActions } from 'vuex'
// 2. 将指定的 mutations 函数,映射为当前组件的 methods 函数
methods:{
...mapActions(['addAsync','addAsync2']),
addf(){
this.addAsync()
},
add2f(){
// 传递参数
this.addAsync2(3)
}
}
Getter
- Getter不会修改原数据,用于对Store中的数据进行加工处理形成新的数据
- Store中的数据发生变化,Getter的数据也会跟着变化
1 | |
- 获取第一种方式
1 | |
- 获取第二种方式
1 | |
相关文章